Users, permissions, departments and disciplines#
This part is used mainly by administrators. It determines who sees what — and therefore how tidy the system feels for everyone else.
All setup of users, permissions and company settings is done in the desktop version. It isn’t available in the mobile app.
User types#
Carrotz has three user types:
| User type | What it means |
|---|---|
| Admin | Can configure the system and manage other users’ access |
| Superuser | Extended rights, but not full administration |
| Regular user | Has exactly the permissions the administrator has granted |
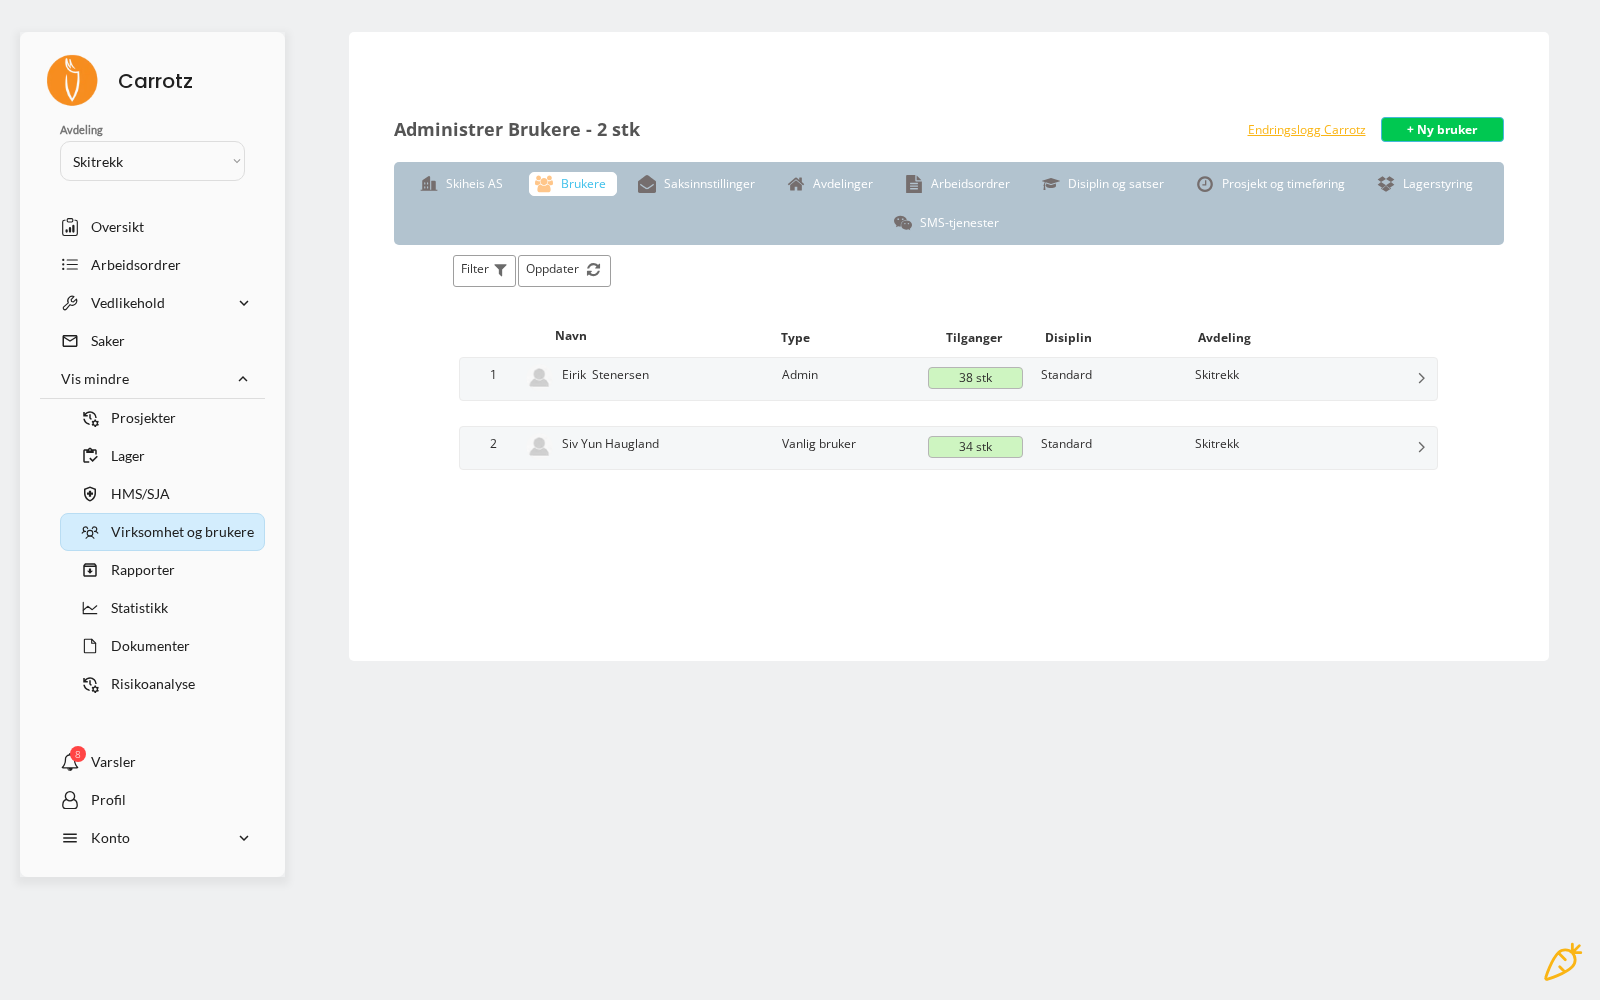
In the user list the type appears in the Type column, alongside how many permissions the user has (for example “38”), which discipline and which department they belong to.
The user type is only the broad distinction — it is the permissions that determine what a user can actually do. Two people who are both “regular user” can have entirely different days in the system.
Users#
You can:
- Invite new users
- Deactivate users who have left
- Change contact details and notifications
- Grant the right permissions
The fields when creating a user#
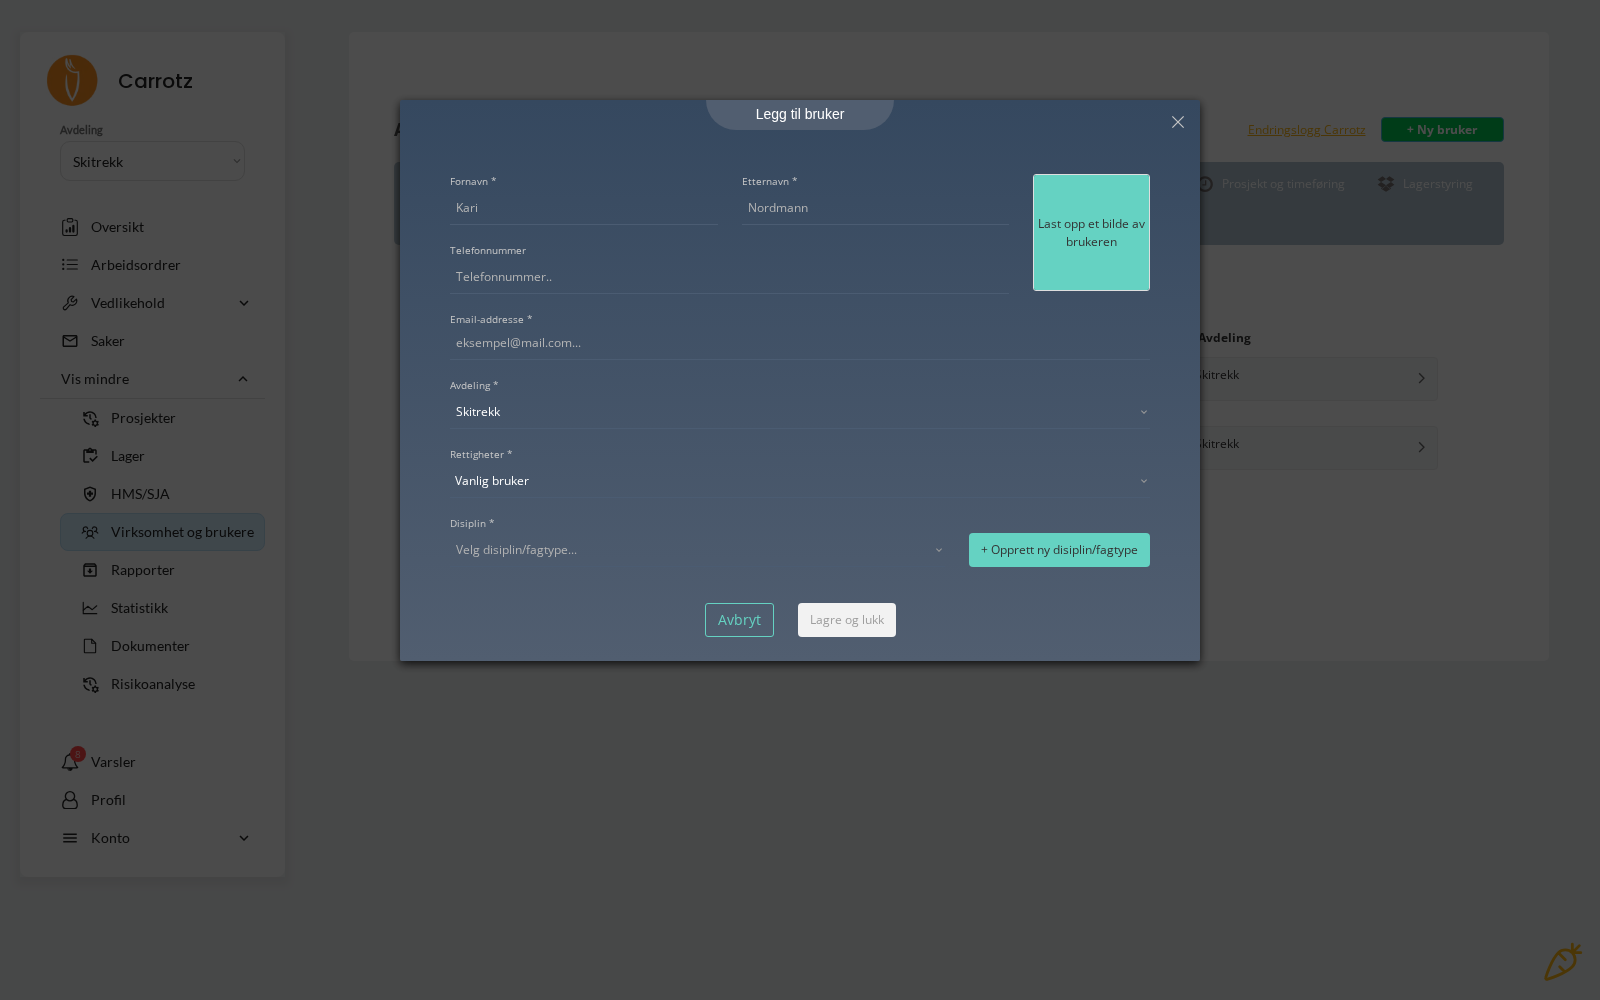
When adding a user you fill in first name, surname, email, and optionally phone number and photo — and set three things that determine what the user meets:
| Field | What it controls |
|---|---|
| Department | Which part of the organisation’s data the user works in |
| Rights | Admin, superuser or regular user |
| Discipline | The trade — and therefore which work lands with them |
If the discipline you need is missing, you can create it directly from the form with "+ Create new discipline/trade".
The very first user#
If your organisation is new to Carrotz, you must contact Carrotz to have the first user created. That user becomes an administrator and can then invite the rest of the team from the admin page.
Deactivate rather than delete. A deactivated user loses access, but the history keeps their name — so it remains traceable who carried out work in the past.
Permissions#
Permissions are granular: you grant access to individual features for individual users, organised by domain.
| Domain | What the permission controls |
|---|---|
| General | Basic access in the system |
| Locations | See the structure, change it |
| Objects | See equipment, create and edit |
| Work orders | See own or all, create, edit, complete |
| Work routines | Checklists and routine descriptions |
| Maintenance plans | Create and edit plans |
| Cases | Record deviations, handle and close cases |
| Document management | Read the document archive, upload, manage signing |
| Inventory | Record usage, manage stock |
| Projects and time registration | See and log against projects |
| Risk assessment | Create and revise risk assessments |
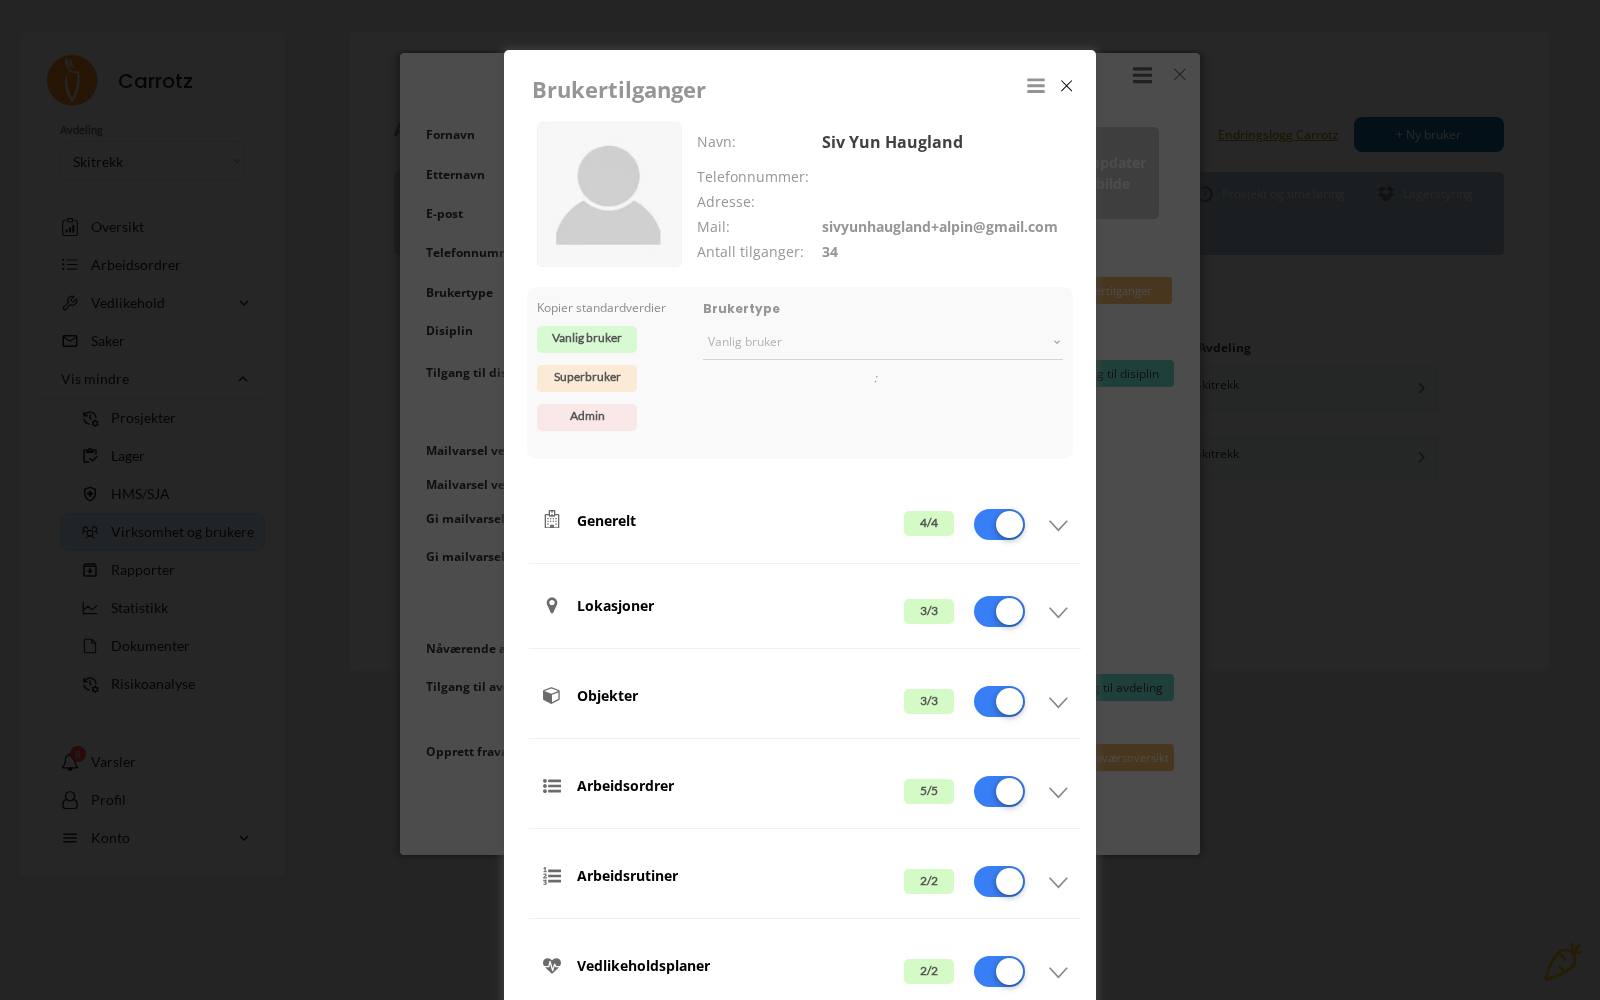
Each domain shows a counter — for example 4/4 — telling you how many of the permissions in that domain the user has. At the top sits the total number of permissions, so you can see at a glance whether someone has too much or too little.
Use “Copy default values”. Inside the permission view there is a function that fills in the standard setup for you. Start there and adjust — it is far quicker than setting each permission by hand, and gives a more consistent result across colleagues with the same function.
The principle that works best: grant access to what people need, not to everything they might conceivably need. A field user who only sees their own jobs and what they need to record works faster than one navigating past setup menus they never use.
Departments#
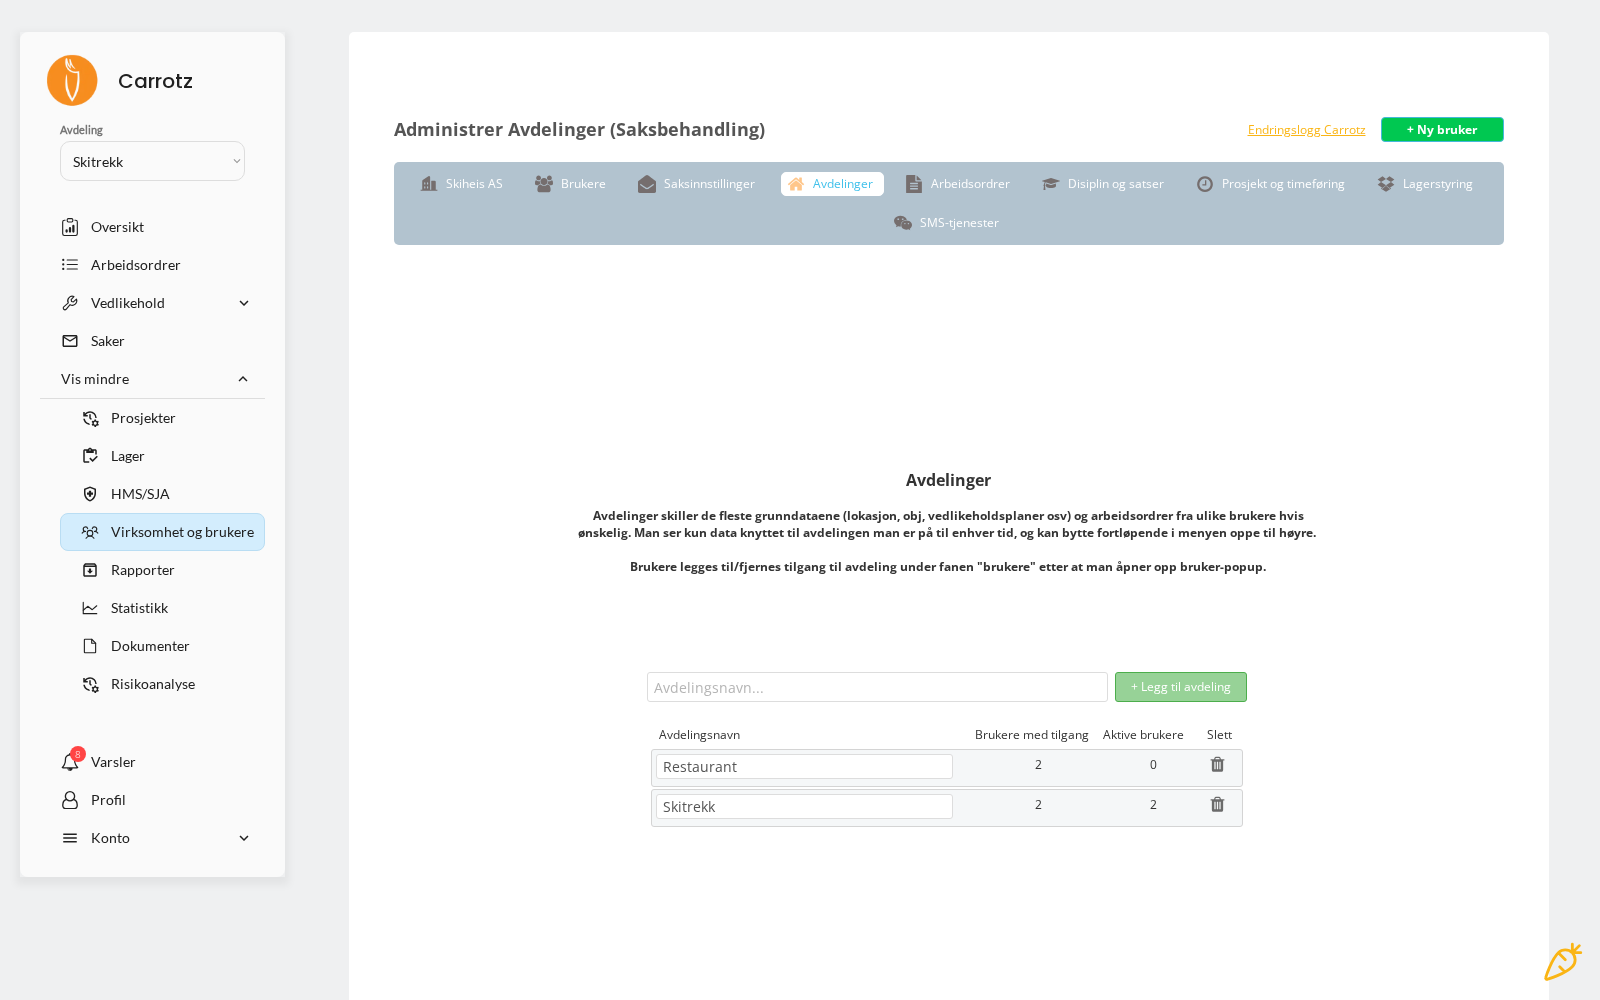
Departments are used to organise and separate data between parts of the organisation.
Typical use: geographically separate sites, or business areas that have no need to see each other’s work.
A user can have access to several departments, but sees one at a time. If they have access to more than one, they can switch:
- Desktop: at the top of the sidebar
- Mobile: from the menu on the app’s home screen
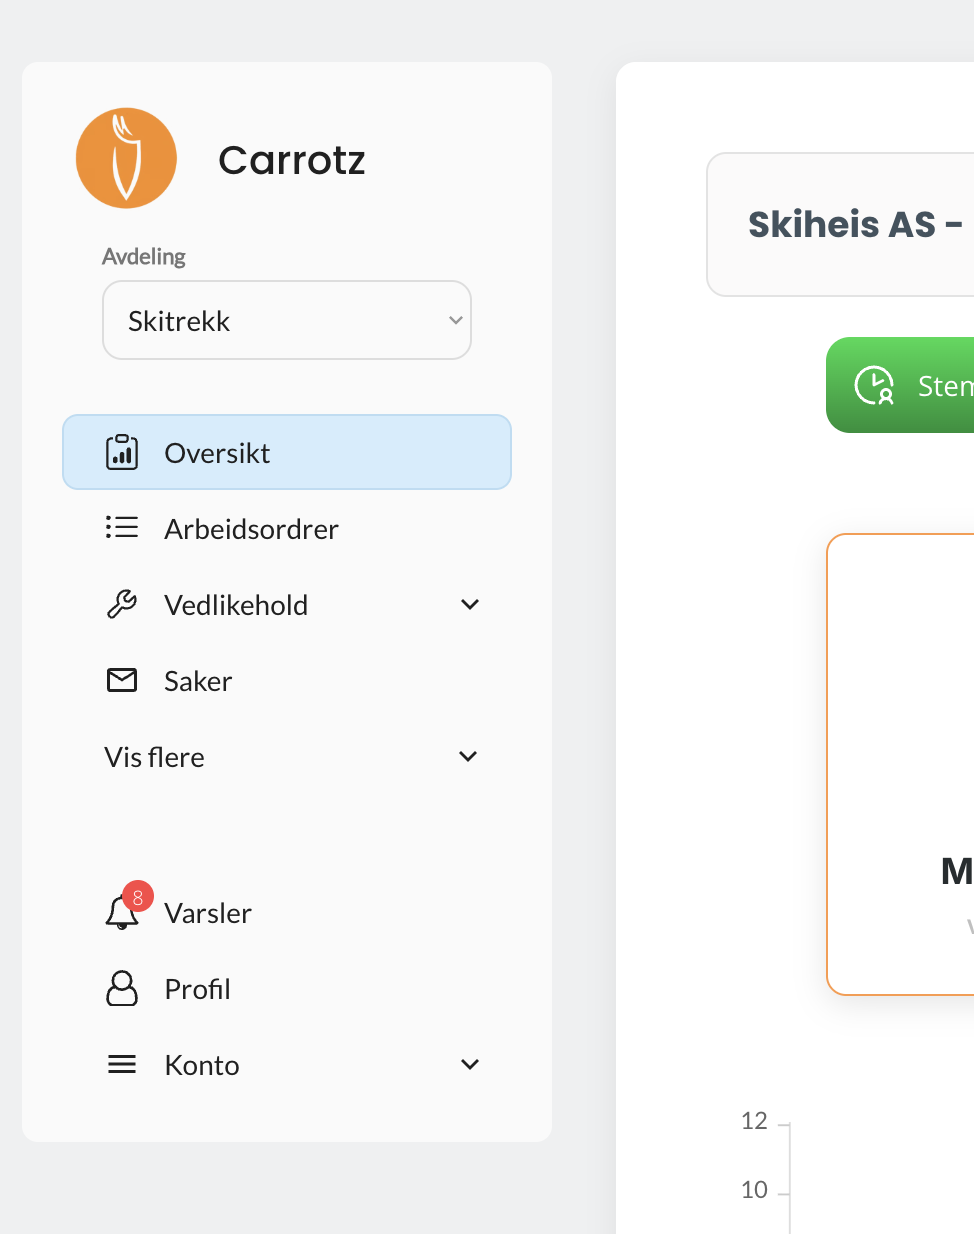
This is by far the most common support request: “I can’t find my work order.” Usually the user is in the wrong department. Mention it first when someone reports missing data.
Disciplines#
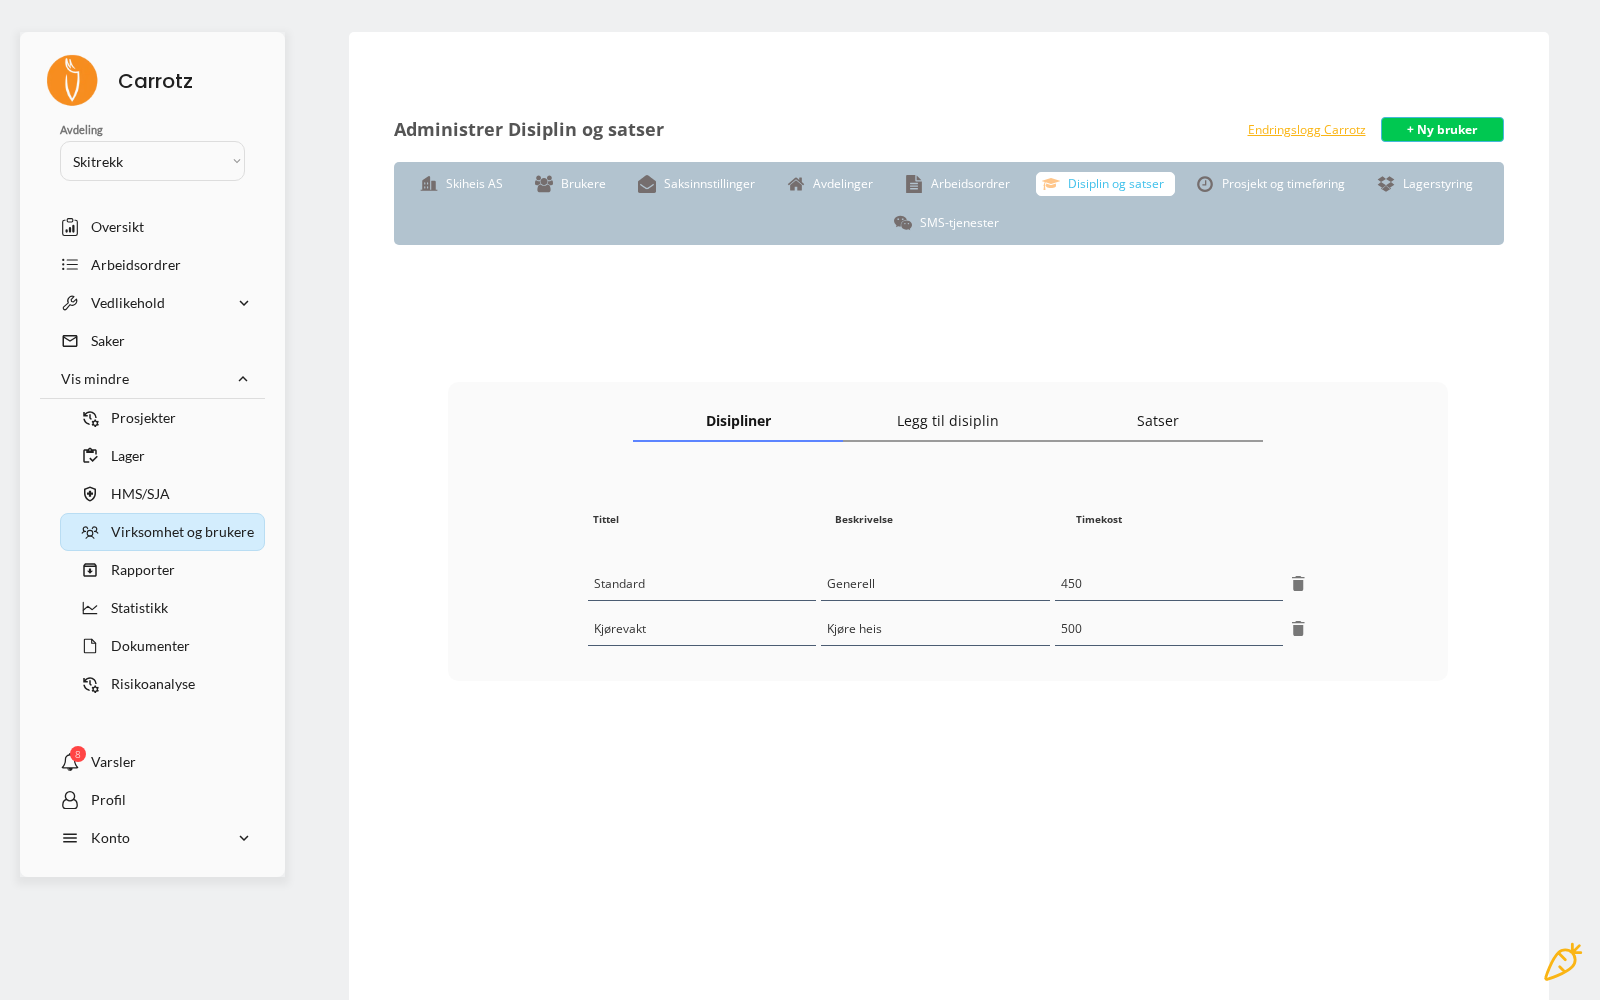
Disciplines describe trades — electrical, mechanical, automation, building.
They are used for three things:
- Assigning work orders — work can be assigned to a discipline rather than a named person, so the right trade picks it up
- Document signing — signing requirements can be assigned to a discipline, so everyone in that trade must sign a document
- Time registration — the rate follows the user’s main discipline
A user can have up to five disciplines#
A user is set up with one main discipline, and can additionally be linked to up to four disciplines — five in total.
The two roles are not the same:
| What it controls | |
|---|---|
| The main discipline | Time registration — this is the rate used |
| The other disciplines | What the user gets to see |
The latter ties into the permission setup: if you’ve set a user to only see work orders for their own disciplines, they now see work orders for all the disciplines they’re linked to — not just the main one.
This solves the case of people who work across trades. A technician who is fundamentally a mechanic but also takes simpler electrical jobs can have mechanical as their main discipline — the correct hourly rate — and electrical in addition, so they see those jobs too.
Be deliberate about it though: five disciplines on everyone means the work order list fills up again, and the restriction loses its purpose. Add the second discipline when someone actually works there, not just in case.
The other settings here#
Under Company and users sits the rest of the organisation setup, split across tabs:
| Tab | What it controls |
|---|---|
| Users | Users and their permissions |
| Departments | How the organisation is divided |
| Discipline and rates | Trades and hourly rates |
| Case settings | Setup for cases and deviations |
| Work orders | Default setup for work orders, including completion rules |
| Projects and time registration | Setup for the project module |
| Inventory management | Setup for the inventory module (requires the inventory package) |
| SMS services | Notification by SMS |
Change log#
From here you also reach the change log — an overview of what has been changed in the organisation’s setup, by whom and when.
The change log is the first place to look when something has “suddenly become different”. It answers whether a setting was actually changed, and by whom — often faster than troubleshooting the feature itself.
Why these fit together#
The four mechanisms each solve their own part of the same problem:
| Mechanism | Answers |
|---|---|
| User | Who is this? |
| Permission | What are they allowed to do? |
| Department | Which data do they belong to? |
| Discipline | Which trade do they work in? |
Good access control gives a tidy user experience and better data security. It is worth spending time on — and worth revisiting when the organisation changes.
See also Access and roles for the user’s experience of this.